Follow the construction of Tom's super-insulated home in Port Townsend, WA

Sunday, November 28, 2010

Making the house airtight


To be certified as a passive house, the leakage rate at a pressure difference between the inside and outside of the house of 50 Pascals has to be less that 0.6 of the house volume per hour. That turns out to be 160 cubic feet per minute (CFM) for this house. How much of a pressure difference is 50 Pascals? It's equivalent to sucking on a straw and pulling up your drink by 0.2 inches. Getting the house leak-tight took a lot of time. All the sips seams were taped on the outside and inside using Grace Vycor, a butyl rubber tape. We later switched to Fortiflash, which stuck better on OSB. However, we got good adhesion only after going over the taped areas with a heat gun. Very time consuming. The top two pictures show areas that have been taped.

The biggest problems was making the house tight around the windows. The gap between the window frame and the opening in the sips panel was too small to be able to inject foam. Based on our experience, the gap should be around 0.5 inches on each side. We wanted to make an airtight bridge between the inside wall and the window frame, but the plane of the window frame was ~9'' from the inside wall. We pushed a thick plastic sheeting past the inside window frame, and sealed it against the window frame using silicone rubber gasket material. That was only moderately successful because the gaps varied between 1/32" and 3/8". Because the typical opening in the sips panel was not perfectly rectangular, the gap also varied along each side of the window. To give one more layer of protection, we sealed the plastic against the frame using Fortiflash tape. The end result is shown below.

We were confident that the windows were not going to leak. The Vycor did not stick to the concrete slab, so we had to come up with something else to seal the perimeter at the floor. We used the mastic that Premier supplied to glue the sips panels together and put it between the OSB wall and the vapor barrier under the plywood subflooring as shown in the picture above. This caulk will remain flexible and the drywall will provide additional insurance.

OK, we were ready for a blower door test, and it turned out to be difficult to find someone qualified to do it. After about 20 phone calls, I located Bill Foley from Sequim, about an hours drive from Port Townsend. The day he was scheduled to come, we had a blizzard! He made it anyway, after driving for 3 hours. He set up his equipment and pronounced it the tightest house he had ever seen. Unfortunately, he measured 330 CFM, twice what the Passive House Institute requires for certification. he was in a big hurry to get on the road, but just testing with our hands, we indentified about 10 leaks, nearly all of which were around electrical boxes. We had also forgotten to foam around the gas pipe for the kitchen range, Bill had a leak around his fan, and we suspect that the intake and exhaust vents for the energy recovery ventilator were also leaking.


Ideally, we would have sealed the leaks and had him come again. However, he was leaving town, so we pulled out all the boxes, foamed inside the sips panel, and reinserted the boxes with the foam still soft. We're quite confident that we are below the 160 CFM target, but won't know for sure until the house is tested again upon completion. How good is 330 CFM? The blower door manual states that 64 new houses in Minnesota (1984) averaged 1390 CFM, and 6711 older houses in Ohio tested in a weatherization program averaged 4511 CFM.

Now that the house is sealed up, we started heating it using a 1500W oil filled radiator. We have to bring the electricity in through a window, and can only seal up the gap using duct tape, which isn't great insulation. However, on cloudy days at 20F with wind gusts, we could get the temperature up to near 60F. On a sunny 20F day, we had to turn off the heating and crack a window to be comfortable. We have 5 Thermatru exterior doors, 4 of which have full glazing, which I estimate to be 70% of the door area. It is not a good glazing and we plan to switch it out with a higher quality double glazing in the summer. The glass in the doors is the major source of heat loss. We can see that by  the appreciable water condensation on the door glass, and there is none on the Serious windows.

OK, one more picture of my other construction project this summer. This one is finished! Drywall begins tomorrow!

Tuesday, October 26, 2010

The windows go in


Finding appropriate windows has not been easy. The usual sources (Andersen, Pella, Milgard...) do not make sufficiently well insulating windows to allow Passive House certification. We considered Serious Materials and one Canadian source which was more expensive. German windows are available and top of the class, but not in my budget. We finally went with the fiberglass frame Serious windows. The hard part to swallow was the cost which was about $50/sf based on rough opening - $19k for 16 windows. By comparison, you can buy vinyl frame windows at Lowes for about $15/sf and double pane low e fiberglass frame windows for about $30/sf.

So why have windows? Well, it's useful to be able to get light into the house, and to look out of the house, particularly if you can look at trees and the sky as opposed to your neighbor's walls. Can you have too many windows? Yes, because windows are not as well insulated as walls, the floor, and the roof.  Heat leaks out of the house in a number of ways, and a major pathway is windows -especially after the sun goes down. However, there is a big positive potential to windows, namely, in the daytime, they can harvest light from the sun and convert it to heat. So the goal is to maximize light harvesting and to minimize the losses from the windows that don't collect much light and from all windows at night.

In the heating season, the sun is low in the sky, and although it seems hard to believe, if your house were in the form of a cube with the area of all sides being equal, more light would hit the south face than the roof. So the obvious rule ought to be to carefully orient your house to the south, and maximize the window area in that direction. Take a walk around your neighborhood and see how many houses have been designed that way. You won't see many.

Maximize the window area to the south, minimize the area to the north, where you will not harvest sunlight and have intermediate values on the east and west sides where you have some light harvesting, but significantly less than to the south. On my house, there are 363 sf of windows including the glass doors. 167 sf are on the south side, 81 on the west side, 71 on the east side, and 45 on the north side. The images at the top of this posting show (from top to bottom) the east, south, west, and north sides.  Each window must give values for 3 numbers. The U value where U = 1/R is a measure of the insulating strength. The solar heat gain coefficient (SHGC) measures what fraction of the sunlight is harvested, and the transparency measures what fraction of the light incident on the window enters the house. There should be a fourth number that is a measure of air infiltration, but disclosing that number is voluntary, so it’s not done.

Ideally, you want U to be as high as possible on all windows. It varies between 0.14 and 0.20 for my windows. The lower numbers are for Serious 925 series windows, which have 2 glass layers and two polymer film heat mirrors, which is equivalent to quadruple glazing. These windows are expensive, and we have them on the east and west sides of the house. We used the 725 series which have 2 glass layers and one polymer films on the north and south. Both series have krypton gas as a filler The SHGC should be large for the south windows (it is 0.50), smaller on the north windows (it is 0.21) with intermediate values for the east and west windows(~0.40). Ideally, you want the transparency of the windows to be high, but that is incompatible with large U values. How can one harvest sunlight? Sunlight enters the house as visible light, but leaves as infra red light. Efficient windows are coated with materials that have a high transmission for visible light, and a low transmission for infrared light. You harvest sunlight by allowing the visible light to enter, but making it hard for infrared light to leave. The coating reduces the transparency, which varies between 38% for the north windows, and 65% for the south windows.

Given all these variables, how should one choose window area, U values, etc? That was Jesse Thomas’ responsibility, and he relied heavily on a software program from the Passive House Institute that allowed him to vary window area, U values, etc and calculate the energy usage by the house. The inputs to the program included detailed average local weather information throughout the year, and a lot of the details on how the house was constructed. He did a cost-benefit analysis of using 725 vs 925 windows and came up with the final window design. The performance numbers are interesting. 41% of the heat loss from the house goes out through the windows, even though the windows are only 8% of the surface area of the house including the slab and roof. However, 47% of the energy needed to operate the house comes from harvesting sunlight .

So the windows are doing their job, allowing in natural light and passive heat gain. Importantly, we have more gain than loss from the windows. To say this differently, if we had left out all but one of the doors and all windows and lived in the highly insulated space, we would need more energy than having the somewhat energy leaky windows and doors. However, without the expensive windows, the energy loss would be significantly greater than the gain.

Friday, October 8, 2010

The roof goes on


Before the roof panels go in place, we need a ridge beam, which is supported on two 21' high fir logs.The top picture shows us hauling the logs onto a trailer using a come-along. We got five, of which 2 will support the roof over the front porch. That was a good morning's work.I peeled them at the site as shown in the second picture, and two posts were hoisted in place using the crane. In the lowest image, the ridge pole is placed on the log posts.

On day 30, the roof panels arrive.  They are unloaded in an hour or so, and the first panels on either side of the dormer the go up the same day. The fourth image below shows the dormer roof, which was put together from smaller panels on the ground. The come-alongs seen in the left of the image allow the tilt to be set so that the panel comes down with the same clearance everywhere. In the fifth image, it is being set in place. The sixth image shows a short log post being slipped in before the roof is shut.  All roof panels are in place on day 34. The last image shows the added on eaves. The 12" roof would be too thick to extend out as eaves, so we had to add on eaves built with 2 x 8s.


So how are we doing with the cost and how does it compare with a more conventional house? The  wall and roof panels cost $33k, including the crane rental, sales tax and delivery. It took 3 men 8.5 days to put them up plus 2 days for the eave construction. Counting workers comp, social security, etc and the 8.4% sales tax, the labor costs for putting up the walls and roof were $6.2k. Total cost of the fully insulated shell is ~$40k. One of the contractors I interviewed priced out conventional framing and sips for this house. The labor would have cost ~$5k more, and the insulation would have cost $12k. The total cost was identical to within ~$2k.

Sunday, September 26, 2010

The walls go up


On day 26, the 10" wall panels arrived. They consist of inside and outside layers of 7/16" OSB and 9+ inches of high density EPS which has an insulation value of R-5 per inch. I held my breath during the unloading because of the bow in the 2 x 4s supporting the load (2nd picture). Three hours after delivery, the SW corner is up.


 The first few walls went up piece by piece with Charles operating the crane and Mike and Bill getting the panels in place. It's not easy bringing the panels together and forcing in the structural members like the double 2 x 6s that you can see in the top image. Come alongs, pry bars, heavy hammering all helped. The east wall was the last to go up, and by that time, there was enough room on the slab to assemble the whole wall before lifting it in place. You can see the attachment plates used to lift individual panels with the crane in the lower picture. Here the plates are being used to squeeze 4 panels together with a come along.


The top image shows the east wall being lifted in place and the bottom image shows the house with all the walls up. The whole process took 3 1/2 days with 3 workers. Keep in mind that the insulation for the walls is also complete and there is a complete nailing surface on the inside of the exterior walls.

Tuesday, September 14, 2010

Foundation II

Because Port Townsend is in an earthquake prone area, the foundation needs to be solid and the house needs to be firmly attached to the foundation. From an energy conservation point of view, the slab and foundation are often not optimally designed. Concrete is quite a good conductor of heat, and if the foundation is in good contact with the earth and the house is in good contact with the foundation, you have the potential of a significant heat loss. One possible design is that of a thickened slab in which the edges, which support the  walls, are thicker. To integrate this design into a passive house, you would need to put foam under the entire foundation. That design has been approved by a Seattle structural engineer, which means that we could do it here. However, I am not confident that there will not be microbes that will degrade the foam over the lifetime of the house - at least 100 years. Therefore, I'm building a tried and true footing and stem wall that are in direct contact with the earth and a separate slab. The footing and stem walls support most of the weight of the house. There is 10" of underslab insulation to cut heat loss to the ground, and additionally, there is a 2" foam-filled gap between the edges of the slab and the foundation stem wall. There are pluses and minuses to this design. On the positive side, you have stability and confidence based on at least a hundred years of experience that the foundation will be stable. On the negative side, the expense is higher because construction requires 3 pours instead of one, more form construction, and more time to build.


The first image shows the 10" of foam under the slab and the second image shows the rebar in place. There is a vapor barrier between the foam and rebar. The shaded area in the second image is where the slab will be thicker to support the weight under the ridge beam. Here we have no way to avoid having the foam under this portion of the footing. We're ready for the concrete!


From top to bottom: Note the 2 x 4 on stakes in the image. The stakes go through the insulation into the ground and the top of the 2 x 4 gives a reference level for Hans and his coworkers to ensure that the slab is flat and level. Successive 2 x 4s are pulled out as they work their way across the slab. In the second, third and fourth images, Hans is using the bull float, a hand trowel, and a power trowel as the concrete hardens. When they are done, the top of the slab is flat to within 1/8" over 8' and is nearly polished. The foundation cost $18k, and the ground work which includes excavation, foundation and gutter drains, driveway construction, backfill and perimeter grading, will cost ~ $10k. So we are up to $28k before the walls go up. The added expense for the passive house over a conventional house at this point is ~ $2k, assuming the same type of foundation as opposed to a thickened slab.

The top image shows the foam insulation between the slab and stem wall. The bottom image shows Charles and Mike installing the sill plate over a thin foam layer (Sillseal). Keeping air leaks to a minimum is a critical step in passive house construction. To make up for any roughness on the top of the stem wall, there is a bead of mastic between the concrete and the Sillseal.

Where are we in terms of schedule? Through footing and stem wall construction and plumbing and electrical ground work, we were right on schedule. By the time we poured the slab, we were 6 days behind schedule. The delay was mainly waiting for inspectors and one or two days of bad weather. At this point, we have to wait a week to get the wall panels because of delays in getting agreement on the final design of the panels between the architects and the Sips manufacturer (Premier). If the panels arrive on 9/20 as planned, we will be 11 days behind schedule, where the work week is 5 days.

Thursday, August 26, 2010

Excavation and Foundation I

The top picture shows the site on Day 1. Dick Shold has come in and dug out a hole about 3' longer in each dimension than the foundation footings. As the ground floor is a slab without a cellar, we only needed to go down about 14". The second and third images shows the footings in place which were poured on Day 3.The forms for the stem wall in image 4 went up on Days 4-6. Lots of 3/4" rebar in both footings and stem walls. The 4th image shows the stem wall being poured on Day 7. Nearly all could be poured using the chute from the truck. The rest was done using a wheelbarrow.

In the 5th image, the footings and stem wall is complete. Because all the earth was scraped off to the depth of the bottom of the footings, we need to backfill. The backfill needs to drain well, and provide a good base for the vapor barrier and foam, which come next.  We elected to go with a lean mix of sand and cement, and needed 4 truckloads of 9 cubic yards each on Day 8! The wood forms block out an area below the ridge line in which we need to have a thicker slab.

On Day 9, the lean mix has firmed up enough overnight for the plumber and electrician to show up and dig utility ditches which go in under the slab. Placement is critical; the main conduit that goes up into a 2 x 4 hallway floor has to be with in an inch of plans.Once the pipes and conduits are in place, the lean mix will be shoveled in again and smoothed over to give a good base for the foam under-slab insulation and the slab.

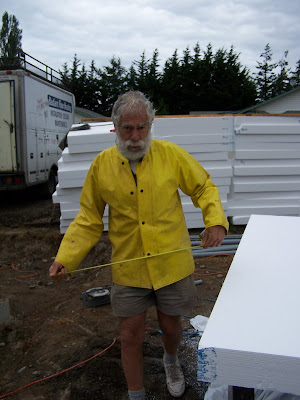
You're looking at $3k of expanded polystyrene foam which will give R40 under the slab. This is 5 times what code requires and is the first significant additional expense of a passive house over a conventional house.My builder Charles in the yellow slicker can't wait and is getting ready to put in the foam in the SW corner of the house where there are no utility ditches on Day 9. The vapor barrier goes under the foam and will go under the sill plate.